Friday, 25 November 2011

Moving on . . . . . . . . again

Here we go again, been some time! The regular blogger is always busy (me too) so here goes:


Got the boat out of our 'shed' with some difficulty as I forgot to ask our neighbours to leave space for us to get the GT6 out, thank GOD I/we have a handful of friends! To the owners of the cars: sorry if there are any scratches on said vehicles. It took about an hour and a half but eventually got her out and on the trailer.


We used the old set of bunks/poppets that we had the GT6 sat on when we were doing all the work tied to the trailer with some gash line we had.


Then off to the 'other' boat shed. PJ is making the final poppets for the trailer and helping out with the glassing, filling and fairing of the hull in preparation for painting. There are a number of small jobs to do pre-painting, these hopefully won't take too long. I would like to fit all the hardware, step the mast (bond the mast collar in place, fit the mast step and get the rigging sized) before the painting gets done. It's easy, isn't it? As winter approaches these small tasks get more difficult.


More soon, the hull is glassed and almost finished with the fairing, poppets next


Monday, 11 April 2011

Cabin Fever

If you remember, I originally drew a "blister" style coach roof; this had one degree of curvature (part of a cone) but probably, when it came to practice, too much curvature for the 6mm ply. Instead I have redrawn with a hard chine (already dubbed "stealth") coachroof. Not only is this easier to build but means we can use the offcuts of the cedar battens and plywood. Waste not want not! I am also convinced by the argument put forward by a local boat builder that it looks more in keeping with the hard-chine hull form.... Access under the coach roof; note the grey high build added before the coach roof structure.... thinking ahead for once!
At the moment just bogged in with glass fillets and already solid as a rock!! Frame spacings are based on our experience of the support required for the 6mm ply when building the deck.

More Sprit

Just to explain what we did concerning the last blog: Firstly we wrapped the existing pole with 4 layers of uni UT-C400/500 then we wound some more carbon winding filament to make sure it was nice and tight (we did the winding by putting the pole on a hand drill and fed the filament on while is span round.... slowly!!). Finally we added some XC411 carbon to affix the pole to the bow and the existing structure we had. I light bogging with some micro-baloons and finally a coating of high build (I will add a picture later) A little more bogging and fairing will be required. MMmmm perhaps we should have just gotten a bigger pole!!

Friday, 8 April 2011

Bow WOW!


After much umming and ahhhhing we have decided to go with a fixed bowsprit for hull no.1 - This was not the original intention; the carbon tube we aquired for the sprit just didn't look man enough for the job... We did consider beefing up the section and recutting the launch tube, etc, etc but in the end thought it would be quicker and easier to run extra uni-directional carbon fibre on the outside rather than cut and shut our exising work. We can also support it further with the bow i.e. a fixed sprit (also we had some spare carbon). The intention is to mechanically fix the sprit (bolt on/off) so we can remove for trailering and stowing. This is probably the most technical piece of work that we will attempt on the boat and assume that subsequent boats will likely use a retracting sprit.


Thursday, 7 April 2011

Chainplates


The chainplates have arrived. These are 6mm Stainless with backing plate. We got these made up by a local metal worker to our drawings. The plate is bent to pick up the angles of the shrouds.


In order to get the chain plates at the right height we made a small jig by glue gunning some scrap bits of wood to the chain plates. We then drilled them off before adding the cockpit sides (see previous blog)

Chainplates aligned with the jig on the side deck

Cockpit Sole and Sides


Well; quite a bit to blog about - looks like Gerry has been very busy. I did lend a small designers hand this week but I cannot claim much credit!


So starting where we left off....


Cockpit:


The sole at this point, whilst bonded down, was still causing Gerry and onlookers concern about the bending we were seeing underfoot. However as the sides go on, plus a little taping to protect the deck and then the footchocks - all should be well!


Cockpit sole:


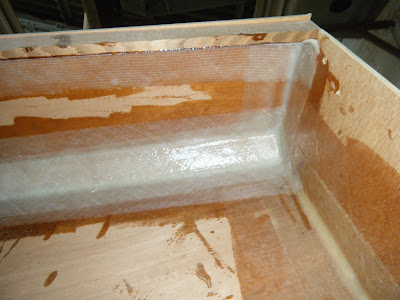
A thin layer or 165g glass all over the sole was added to protect the wood from all our stomping and dropping of screwdrivers and weather etc later on. This also has the benefit or stiffing the deck further. We actually extended the glass over the cedar batten (filleting first) then peel - plyed.


Next we added battens to increase the gluing area for the side panels (exactly as we did for the cockpit sole). The amount of bonding area that we have added is massive and lesser solutions may be appropriate!! Reinforcements for the deck gear (e-plate) were also added . For the chainplates we reinforced either side of the bulkhead with more layers of glass and another layer of 6mm ply.... should be stronger than the pins!!


E-plate shown here is for the spinaker ratchet flip-flop block.


Cockpit sides on - shown with fillets

Tuesday, 22 March 2011

Sole bonded down

The cockpit sole has been bonded down, the cedar batten as per 'cockpit sides to deck corner' piece is going in place (see below) We've used lengths of pine to 'wedge' the cedar in place, ensuring the batten looks fair. Then to bond and glass the outboard side to the sole.


Again, below the 'wedge' can be seen. the same cut outs as top of the bulkheads


As the angle of cockpit sides changes towards the bow, we had to clamp the most forward section of the batten to maintain the changing angle (below almost visible). Once the batten is glassed in place we'll be filling and fairing the cockpit sole before glassing it. This should stiffen the floor quite considerably as the 6mm plywood is rather soft between the bulkheads. The cedar batten has stiffened the outboard section of the sole loads. Once we have our foot chocks in place this will/should be enough


Next: A long day of sanding the sole!!!


Monday, 7 March 2011

PLANS

Lots of emails over the last few weeks from people about plans..... must be the progress Gerry has been making with the build! I have started to collate the drawings and update the modifications we have made - I am giving myself a couple of weeks to sort out the plans by sneaking time between other projects; indeed I am typing the introduction to the plans as you read this! Watch this space....

Tuesday, 1 March 2011

Cockpit sole cut and dry-fitted


My Explanation

Mast base structure:


Mast base and fin top structure, straight edge same height as the cedar battens


At fin top structure: The cockpit sole will bond to the bottom e-plate making the sole height the same as the structure? It might need a little filler as the heights are not perfect.


01 March 2011

These pictures have come out in the wrong order, please bare with me as I don't know how to change them around!

So starting from the bottom of the post . . . . . . . . . .

Below we have the structure all in place, All bonded and glassed to the bulkheads. ready for the cockpit sole to be bonded down. I made a sheet of e-plate 6mm thick, doubled up on some of them, where the underside of the sole will bond to the top of the lower layer (?) I'll post a pic with an explanation later.

Two coats of EPOSEAL 300 rolled on, on the inside of the hull, all bulkheads and under the deck.


Cedar battens (15mm x 15mm) bonded onto the bulkheads, note the 'straight-edges' and clamps.


As above; the bulkheads were planed to ensure that they were all at the same level, ready for the Cedar battens. The main bulkheads were bang-on, the intermediates needed a little work. Not a major if they ended up slightly lower as the batten would bring it up to the right height. Much the same thing with the longitudinal.


Deck is finally done! Ready to move forward!


Wednesday, 19 January 2011

Deck going on

The first length of deck on the starboard side is bonded and glassed in place, cut from template, as Guy mentioned in an earlier post: The fit was not perfect!!! The aft and fwd sections are a good fit. The middle section needs re-making.

A bit of a mission getting under the deck to bond and glass (below) but I did manage with a little swearing etc! As mentioned in one of my last posts, 2 more layers of glass holding the deck to the chamfer, staggered. Inboard end (deck to Cedar batten) a single layer of glass, and single layer under deck to bulkheads join. The pic below was taken looking upwards.


A little planing and sanding and it's all smooth, ready for some filler.

So (as below) I have a long way to go with more swearing. Hoping to get the next (middle) section prepared later today and bonded etc in the next few days. Then to repeat the whole process on the port side.

More posts and photos when the deck is on completely. Might start to look like a boat then.


Another BABY!

This time it belongs to Guy and his partner. Born early Saturday morning 15/01/2011, so I guess I'll not be seeing him here to help me then?

Congratulations to you both (+ 1).

Photos on starting to bond the deck down to follow.......

Tuesday, 11 January 2011

Deck Chamfer

Guy has given me the templates for the deck chamfer. One full sheet of plywood was used, cut into 250, 200 and 150 mm wide pieces. Once joined with with filler and a layer of glass each side the template marked out and the plywood cut, planed fair and sanded. The join this time was scarfed as the chamfer pieces are only 50 mm wide. A router was used for the scarf.

Again 'stitch and glued' into place, cable ties and a small fillet of glue yesterday to hold until the cable ties could be removed. Today a bigger radius fillet and the glass on the port side done. If time etc permits: STB side tomorrow.

We glassed from the top of the chamfer downwards and then peel-plyed. The plan is to then glass from that join upwards to the underside of the deck when that goes on (which is the next job as I have already cut them) And for the sake of it another layer of glass over the lot as this will be the most likely area of impact. Should that happen!!!!
As the first picture shows, the join between the hull and chamfer timber is pretty close, only very little filling is required before fairing. Some of the areas on the hull needed a little 'pulling and pushing' whilst cable-tying to get a fair join. All-in-all it's looking good!

Friday, 7 January 2011

Round the Bend


As mentioned in the last blog we have cut in a strip of cedar to define the cockpit deck joint. The strip is continuous and let into the bulkheads. I will update the plans to reflect this and the bulkheads can be cut with this notch when loftng/CNCing the bulkheads; this way the strip will just drop in. You can see how the removal of the coachroof bulkhead has aided this process.

Gerry is at the boat today doing the hull to deck joint. He is using plywood from a printed template that I have provided; it is a developable suface (one degree of curvature) and should fit exactly. However, I am contemplating using the same size strip of cedar at the chamfer (minor mod required to the drawings) as this will again allow this very visible part of the boat to built fair as well as the providing a stiffer corner for the plywood to butt up against before taping.
The side decks have been butt joined together and are ready to go on. We used the exact same method as we did when making the hull planks. We have offered them up to the boat but the fit does not appear perfect; it seems there is too much curvature in the deck for the computer to produce an exact developed surface. We shall see what fun we have when it comes to putting it on for real(!) but I think the best way to proceed is to remove as much deck camber as possible from the design so we know that a pefect fit can be achieved from the patterns. After all the aim must be to produce a pack of plans which fit together with as little modifaction as possible.

Cut 'n' Shut

Thank you for all the emails since the last post. As promised we are back (well mainly Gerry) on the case. We are making a few changes to the build process as we go along; this is the prototype after all!


The first thing we did is remove part of the coachroof bulkhead. We will almost certainly build this as a seperate item later (the overall look of the boat will remain the same). This will also make the build a little easier - see the next post. We have also added a few intermediate ringframes. The boat is going to be much stiffer than it needs to be but it will mean that we do not have to worry about any deck beams now, especially as we intend to add stiffness to the deck with a layer of glass and foot chocks. You can also see in the photo a piece of cedar strip in way of the side deck to cockpit resting on some temporary cross beams. We feel this is the quickest, easiest and fairest way to finish this corner. We may even be able to get a nice little rad on the corner for comfort!!